AR15 Furniture Page 1 Page 2 Page 3 Page 4 Page 5
TO VIEW FULL SIZE IMAGES: USERNAME and PASSWORD are both "mm"
Battle Arms Development Fixed Stocks
7/7/15 - Battle Arms Development, most well known for their line of modular ambidextrous safety selectors and other small accessories, has expanded their lineup to include full rifles and larger components. Two of these new offerings are their Light Weight Butt Stock for Milspec receiver extensions, and Sabertube Stock. Light Weight Butt Stock for milspec receiver extensions - The BAD-LBS-MIL is an aluminum butt stock that fit all mil-spec receiver extensions. Note that it also fits the Vltor A5 or BCM intermediate extension as those follow the mil-spec profile. It's a clean, minimalistic but functional item, and adds only 3.0 oz to the weapon. The butt stock has a slight angle to it at the heel, and a chevron pattern on the back for traction in the shoulder. The toe is angled even more at the bottom. Here are the main features of the BAD-LBS-MIL:
Installation - The BAD-LBS-MIL simply slips onto the end of the receiver extension, and the clamp screw is tightened. Viola! You've now got a butt stock on your receiver extension! Notes/Observations - The BAD-LBS-MIL is half the weight of the lightest polymer stocks, but of course, you give up the capability to adjust the length of pull. The BAD-LBS-MIL adds about a 1/4" in length to the receiver extension, so the length of pull is basically dependent on the receiver extension used. On a carbine-length receiver extension, it's equivalent to shouldering the rifle with a collapsible butt stock fully closed. I'm not a big guy and I find it pretty short. It's more suitable for an SBR set up as a PDW, with the understanding that the user is going to be rotating the shoulder pocket forward and shooting NTCH. Or, for use with a plate carrier where the plate adds standoff distance when the butt stock is placed on the plate vs. the shoulder. The aluminum butt stock has decent purchase on the shoulder over nylon gear - it's a matte finish so it's not slippery. I'd say that it's about the same as a polymer stock, but not as good as one with a rubber pad. I found the Vltor A5 receiver extension to be the minimum suitable length for using the BAD-LBS-MIL (for me); as the 3/4" it adds over the carbine extension makes quite a bit of difference. It's short, but not cramped - it's the same as the 1st position out on a collapsible stock. Another viable option is to use it in conjunction with the Law Tactical AR Folding Stock Adapter, which adds 1.3" to the length of pull. The folding stock adapter and LBS-MIL buttstock would make for a compact, low bulk setup. Sabertube BAD-LBS Light Weight Stock Combo - The Sabertube/BAD-LBS Light Weight Stock combo is a minimalist stock that's made up of two components: a proprietary, unique-looking buffer tube and butt stock. There are two versions; the one shown here that does not have a end plate, and a version that has an end plate for QD sling swivel. The total weight of the combination is 6.8 oz.
The Sabertube is 1-3/4" longer than a standard carbine tube, but uses a carbine spring and buffer as the internal length is the same as a carbine tube. I'd like to see an A5-compatible version of the Sabertube, since all that needs to be changed is the location of the rear wall. The Sabertube is dimpled along its entire length for weight reduction, which is its most distinctive feature. The front of the Sabertube threads into the rear of the receiver. There is no keyway for a receiver end plate, as it doesn't need one. It indexes on the shoulder and cannot be screwed into the receiver any further. The BAD-LBS for the Sabertube is different from the BAD-LBS-MIL shown above, and is only compatible with the Sabertube. It has a clamp that secures it to the end of the Sabertube. Every effort has been made to lighten it, including a titanium screw and material removed from the toe. It has a rotation-limited QD sling swivel socket in the middle, vs at the toe. Since the Sabertube doesn't use a receiver end plate, it's compatible only with lower receivers that have captive rear takedown pin detent springs, like the BAD556-LW lower receiver. However, it's extremely inexpensive and simple to install a set screw on any receiver. All you need is a 4-40 tap and set screw. I paid about $3 for the tap and 20 cents for the set screw at the local hardware store. All you have to do is tap the first 1/8" of the detent spring hole at the rear of the receiver. Go slow and check the depth of the set screw; tapping the hole until the set screw bottoms out when flush with the rear of the receiver. Trim 1/8" in length off detent spring, and install the rear takedown pin normally, capturing the spring with the set screw. You can still use a receiver end plate with the receiver for a normal build, but the captive spring makes it easier to install and remove end plates/receiver extensions. The Sabertube simply threads into the end of the receiver, bottoming out on the shoulder. There are no provisions for a wrench; nor does the Sabertube lock in place. I used an improvised strap wrench to tighten the Sabertube to the receiver. The butt stock is installed onto the end; clocked by eyeball and the titanium screw tightened. The Sabertube with LBS is shown below compared to a receiver with Vltor IMod stock one click out. The number of clicks out depends on the receiver extension. Anyways, the distance from the rear of the LBS to the rear of the receiver is approximately 8.4".
Notes/Observations - Like the BAD-LBS-MIL, the Sabertube/LBS combination is a minimalist/light weight set up, for those who are willing to forego adjustable length of pull. At 8.4", the Sabertube is just the right length for me, but someone taller or with longer arms may find it too short. It's equivalent to running a carbine stock one to two clicks out (approximately - depending on the receiver extension). My initial thought when seeing the dimples was 'that doesn't look that comfortable', but it's actually not bad. Not quite as comfortable as a smooth plastic surface, but nothing to complain about. If I had to change something though, I'd go with dimples with rounded bottoms like a gold ball, instead of dimples with square bottoms, so that each hole wouldn't have an edge. I also found the aluminum buttplate less comfortable than a stock with a rubber butt pad, which is to be expected, especially in the prone position where it's more against the collarbone than in the shoulder pocket. There are other things to consider when using the Sabertube or the BAD-LBS-MIL; in extreme temperatures (cold or hot), it might not be as comfortable initially to the bare cheek as a plastic stock. Not that that's stopped people from using metal-stocked weapons for decades like the Uzi, MP5, G3, AK folder, Sten etc. I left the rifle in the trunk of my car while eating lunch at the range and it was pretty hot afterwards. The BAD-LBS-MIL and Sabertube take 'minimalist' to the next level on an AR and are specialized items intended for those wanting something simple and light weight; and can live with the fixed length of pull. They're not for everyone, but then, Battle Arms Development is thinking out of the box and not all of their products are meant for the masses.
|
Battle Arms Development VERT PDW Stock
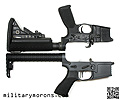
5/8/16 - Battle Arms Development introduced their VERT PDW stock system at this year's SHOT show. The VERT stock is an ultra-short collapsible stock with a length of only 4.75" fully collapsed. Background - A PDW (Personal Defense Weapon) seems to be a nebulous term that could probably be applied to just about anything that one could carry and use in defense of one's life; such as a pistol. In this context, it describes what used to be a class of firearms that comprised of compact shoulder-fired automatic weapons that could defeat body armour; smaller than an assault rifle but with better penetration than a pistol-cartridge powered sub-machinegun. When I think of 'PDW', the HK MP5-K PDW introduced in the early 90's immediately comes to mind, even though it still used the 9x19 round. The FN P90 and HK MP7 were designed from the ground up as PDWs, including their proprietary cartridges. More recently, the term 'PDW' has been expanded to include sub-compact assault rifles, which are essentially greatly shortened versions of their standard-length counterparts (even shorter than carbines). These PDWs fire rifle cartridges, at the expense of reduced muzzle velocity and increased muzzle blast. AR-15 pistols, long regarded as novelties, have seen increased interest over the past few years. A pistol is any weapon having a barrel length of under 16" and does not possess a stock. Shooting an AR-15 pistol is a challenge if you're trying to be accurate, and it's helped marginally by stabilizing the stock-less buffer tube against the cheek. Wringing out the most controllability out of a pistol-length AR-15 requires a shoulder stock. This, however, then classifies it as an SBR. A short-barreled rifle (SBR) is one with a stock and a barrel length of under 16" or overall length of under 26"; and requires a $200 tax stamp as they are regulated by the BATFE . PDWs by definition fall under the SBR umbrella, being short-barreled weapons with stocks. So, when it comes to the AR-15, what's the difference between an SBR and a PDW? I don't really seen it defined anywhere, but I'd say that a carbine stock and barrel of 10.5" would be an SBR and the combination of an even shorter barrel and specialized sub-carbine length stock would be a PDW. The AR-15 buffer tube is the limiting factor in reducing overall length (of the receiver). In order to have a stock shorter than carbine length; there are two options: go with a side folder like the Law Tactical AR folding stock adapter, or use a buffer tube that's even shorter than a carbine tube. Most AR-15 PDW stocks on the market today utilize a shortened buffer tube with rails/guide rods, that slide through a housing allowing the user to collapse and extend the stock. Something like a more sophisticated version of the M231 Firing Port Weapon's wire stock. BAD VERT PWD Stock System - When BAD started developing their VERT PDW stock, they looked at the PDW stocks available on the market and aimed to address all the shortcomings of each design. They approached it with two solutions; a dedicated lower receiver with monolithic/integrated stock guides - their BAD Monolithic PDW Lower Receiver + Vert Stock System, and the VERT PDW Stock System for standard AR-15 lowers shown here. BAD's VERT PDW Stock has an ultra compact buffer and buffer tube, offers continuous cheek rest, and a collapsed length of 4.7" (compared to the 6.25" length of a standard carbine stock). Some of the goals that BAD set for their PDW stock system were:
Last year, George told me excitedly over the phone saying 'We cracked the code!', meaning that they'd met all their goals in the new BAD VERT PDW prototype. Here are the main features of the BAD VERT PDW stock system:
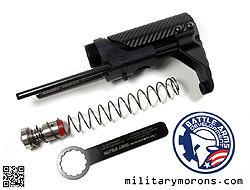
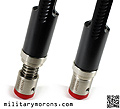
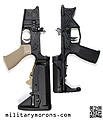
Description - The main components of the VERT stock system are the stock housing, butt stock, guide rods, buffer tube, buffer and spring, and cheek rest. The stock housing and butt stock are machined from aluminum and the guide rods are S7 tool steel. The 7075 aluminum butt is similar in configuration to BAD's LBS-MIL reviewed previously. It has an approximately 5-degree heel angle, and angled toe, and four chevrons for grip. All edges are smoothed out and rounded for comfort. A rotation-limited QD sling swivel socket is located at the toe of the butt. The removable cheek rest is made of carbon fiber-look kydex. The stock housing is machined out of 6061 aluminum with a large lightening hole at the bottom and a low-vis BAD logo marking on the left side. There are two holes where the guide rods run through, which are lined with non-metal bushings for buttery smooth function. Instead of notching out the guide rods to lock the stock in the different positions, the guide rods have ball bearing guides and five detents each on the inside. The guide rods have a diameter of .315", which provides extra clearance than thicker rods for access to the safety levers should there be the need to fire with the stock fully collapsed. Pressing the button/latch on the bottom of the housing releases the spring-loaded ball bearings from their detents and allows the guide rods to slide through the housing. Releasing the latch locks the stock in place at the next detent. The stock locks in both directions. Note that the guide rods are different lengths, with the right side rod being shorter to provide clearance to non-standard lowers with right-side ambi bolt releases. There's a second rotation-limited QD sling swivel socket at the rear of the housing. The buffer tube is roughly 5.1" long, and has splines at the end for the proprietary stock wrench that is supplied with the kit. The steel wrench is nicely made, and is light enough to carry in your cleaning kit just in case the buffer tube needs tightening. The buffer tube has a shoulder which secures the housing to the lower receiver, when the buffer tube is threaded into the receiver. There's a drain hole at the rear of the tube. One of the challenges of designing the PDW stock was how to shorten the buffer. AR-15 pistols and SBRs generally use carbine-length buffers and tubes. Shortening the tube by 1.5" means that a carbine buffer could not be used, and a shorter one had to be designed. It's also not as easy as just shortening the buffer; the bolt carrier also needs to extend into the buffer tube the same distance it did before. Other manufacturers have come up with various solutions to the issue, like proprietary bolt carriers with integrated buffers that extend into the buffer tube. BAD wanted to retain the use of the standard bolt carrier group, and instead designed an ultra-compact buffer that collapses. The buffer is constructed of stainless steel, and has a spring and captured collar. The collar sits against the back of the bolt carrier and when pushed back, allows the beveled nose of the buffer to telescope into the rear cavity of the bolt carrier in the last part of the stroke. The system also uses a proprietary shortened recoil spring. A comparison of the VERT spring and buffer vs. a standard carbine system is illustrated below. The buffer is intended to be used with a mil-spec M16 bolt carrier in a direct impingement system only. Half circle carriers or those with non-standard dimensions (0.626" depth and internal diameter minimum required) will not work. The inside of the bolt carrier must be free of obstruction, so that means that soild-filled 9mm bolt carriers cannot be used. BAD also states that nickle boron bolt carriers should not be used with the VERT system. The standard VERT buffer has a tungsten weight inside it for a 3.9 oz (H1) overall weight. It can be lightened by replacing the tungsten with steel. The advantages of the VERT system is that it does not require a proprietary bolt carrier and the upper can be 'shotgunned' open for maintenance. Installation - To install the VERT stock, the kydex cheek rest is first removed by unscrewing the four screws that secure it to the butt stock. The stock housing is aligned to the receiver, ensuring that the takedown pin detent spring is compressed properly. The buffer tube is then inserted through the stock housing and threaded into the receiver until it is tight and the buffer retainer detent is locked in place. It's helpful to put a small amount of grease on the buffer tube threads before installing it to prevent galling. The supplied stock wrench is then used to tighten the buffer tube to a maximum of 20 ft-lbs. The cheek rest is then reinstalled, ensuring that the front of it is flush with the buffer tube. I put thread locker on the cheek rest screws. The buffer and spring are then lightly lubricated and installed. As you can see from the photos below, the buffer face as a beveled nub that protrudes and centers it in the rear of the bolt carrier. When installing the upper, I just mate it to the lower then slide it backwards; rather than mating it at the pivot pin and swinging it down, as the sharp corners at the bottom of the bolt carrier can scratch the nub on the buffer. It doesn't affect function, but there's no reason to cause unnecessary wear to a component if it's just a matter of convenience. I find it easier to clean the rifle with the upper and lower separated anyway. Shown below is the VERT PDW stock installed on the BAD556-LW lower receiver, compared to a standard lower with BCM stock. The VERT stock is substantially shorter when collapsed, and equivalent to about two positions open on the BCM stock, depending on the buffer tube. It's not quite as long when fully extended, but should be comfortable for all but the tallest shooters. The guide rods do cover the takedown pin in all but the last two open positions, so the VERT stock needs to be extended to push the pin to the left. When collapsed, there's still enough clearance for ambi safety lever access. The VERT PDW stock is a specialized product; designed for short-barreled rifles. Since my lower is not registered as an SBR, I can only install a rifle-length upper on it. By no means is it useless on a carbine or rifle; it's about as short as can be without a side-folding stock. Pictured below, the rifle measures 30.1" with the VERT fully collapsed and weighs 6.0 lbs. Notes/Observations - There's always a give-and-take when it comes to sub-compact AR stocks due to the technical challenges presented when you go shorter than carbine-length. BAD set out to minimize the drawbacks like proprietary bolt carriers, carrier adapters, stock wobble etc, and with the VERT stock, I believe they've accomplished it. Like the other products that BAD has put out, my first impression of the VERT PDW stock was that it was solidly built, and a high-quality piece of engineering/manufacturing. I'm not advocating form over function, but I find the BAD VERT stock the most aethetically pleasing of the PDW stocks currently available. I'm not a huge fan of the carbon fiber look on the cheek rest and would have preferred plain black kydex with a fine, non-glare texture. Too much texture and it could be abrasive on the cheekbone after a while. Installation was a breeze using the clear instructions that BAD includes with the kit. The kydex cheek rest is a nice feature that sets it apart from the rest. If you shoot NTCH, your cheek is going to end up on the buffer tube anyway, so it's a nice-to-have feature, not a necessity. There can, however, be certain shooting positions where NTCH isn't possible, and having a continuous cheek weld is good to have. It also gives the rifle a more 'complete' look. The cheek rest can be swapped out, and BAD is planning on offering different cheek pieces in the future. The guide rods slide very smoothly in the stock housing on non-metal bushing liners, and lock via ball bearings. The use of non-metal bushing liners limits the temperature to 175°F that the stock housing can be exposed to when curing paint like Cerakote. The release latch, on the bottom of the housing, is less intuitive than having it on the sliding part of the butt stock itself, but I figured out that pressing the latch with my index finger while pushing back on the front of the cheek rest with my thumb enables me to extend the stock one-handed to whatever position I choose. If I want to fully extend the stock, simple holding the rifle vertically with the muzzle up and pressing in the latch extends the stock fully as the operation is so smooth. The guide rods are of different lengths, with the right side one being shorter to be compatible with integral ambi bolt release lowers. There is very little play in the stock when locked; just a little bit fore-aft which disappears the moment you shoulder the weapon, and essentially no veritcal or lateral wobble at all; even in the fully extended position. It really feels solid. BAD is confident in the strength of the VERT system and stated that clearing stuck cases by mortaring the stock is fine. I'd fully collapse it before doing so, just like any carbine stock. The step down from the cheek rest to the buffer tube is minimal and no different from shooting a carbine stock. While the design of the VERT allows the user to break open the AR-15 like a shotgun for field maintenance, I found it just more convenient to separate the upper and lower completely. The nub on the front of the buffer tube is spring loaded, so it's depressed when the uppers is swung open or closed. But, as mentioned before, I don't like the way the sharp edges at the bottom of the bolt carrier (the buffer detent channel) scratch the nub when the upper is closed.
In the fully extended position, the stock length is perfect for me, and equivalent to a carbine stock being extended a couple of notches from fully retracted. This might be a bit short for taller folks with long arms, but again, this is a PDW stock designed for close quarters and cramped environments. At the range, I fully expected the felt recoil to be harsher than a standard carbine buffer system, but that proved to be not the case. I was pleasantly surprised to discover that the ultra short VERT buffer performs as advertised, and felt recoil isn't increased. The BAD upper I have is already quite soft-shooting, even though it's a light weight upper, and using it on the VERT-equipped lower was downright pleasurable. The captured secondary spring in the H1 weight buffer slows down the carrier during its last half inch of travel, and helps soften recoil. I did notice increased spring noise in the dry buffer tube until I put some Frog lube grease inside; then it went away. Again, it's important to mention that the rear hole in the bolt carrier must be a minimum of 0.625" ID and be free from rough ridges or coarse machine marks. Make sure that the bolt carrier used with the Vert buffer has a smooth interior and check that the buffer extends into it without hanging up before installing it in the weapon. I shot both Wolf and PMC ammo through the rifle without any issues. The only thing different that I noticed with the VERT system was that when locking the bolt back manually by pulling the charging handle back, I needed to do it authoritatively to overcome the captured spring during the last bit of carrier travel. The first time I thought I had locked the bolt back, the bolt catch had engaged the front face of the bolt carrier instead of the bolt itself. So, when I loaded a mag and dropped the bolt, it over rode the first round and I got an empty chamber. I quickly figured it out and made sure I gave the charging handle a good tug the next time to lock the carrier back fully. While the VERT stock is intended for PDW-type weapons, I don't see any disadvantage to using it on carbines like the one I have (except for parts commonality/interchangeability if something fails at the range). I bring my rifles to the range in my EMDOM TNT GYM Bag (Extended) with the upper and lower separated to fit in the 30" overall length of the bag. With the VERT stock, I'm able to put the rifle with 16" barrel in the bag without having to separate the upper and lower. Imagine how compact an 8" barreled SBR would be. While a side-folding adapter makes the package even shorter, it also increases the width of the weapon with the stock folded to the side, and you cannot fire more than one shot with it folded. With the VERT stock, you can fire it fully collapsed or extended. Just some things to consider. With the VERT PDW stock, BAD has raised the bar when it comes to PDW stocks for the AR-15, from which the customer can only benefit from.
|
10/18/15 -The long-awaited BCM KeyMod Rail Panel Covers from Bravo Company USA are finally out. They're worth the wait! It's taken BCM a while to release their KeyMod rail panel covers. Earlier versions were advertised on the website but never put up for sale, as they hadn't worked to BCM's satisfaction. The wait was worthwhile, though, as the final production version shown here work perfectly. They're offered as kits of five (5) panels in a matching colour. Description - The BCM KeyMod Rail Panel Covers come in only one length, of 5.55", and can be trimmed if need be. They're made of high-strength polymer in the U.S.A. Some of the key features of the panel covers are:
For a while, BCM was showing the unreleased version of the panels in the photo below on the left, with the horseshoe-shaped holes. They never came in stock because they didn't perform to BCM's satisfaction, so KeyMod aficiandos waited (im)patiently. The production version shown here lives up to expectations are are worth the wait. The panels are 5.55" long and cover seven consecutive KeyMod slots. The surface is textured with the same non-slip/non-reflective pattern used on their GUNFIGHTER grips. Instead of the horseshoe holes seen on the prototypes, the production model has horizontal cooling slots. The panel has a curved profile which rounds out the slab-sided KeyMod interface on handguards. On the back of the panels are molded 'plugs' with little tabs which snap into the KeyMod slots. The panels are installed by simply starting at either end of the panel, and pressing the plugs into the KeyMod slots sequentially. Once installed, they're solid and there's no way they're coming out unintentionally. To remove them, insert something thin/sharp (but non-marring) to grab and edge or corner, then pull them off. My son's Lego brick separator works perfectly for removing the panels (thanks to TwangnBang for pointing that out in his video). The panels are flexible (to a certain extent) and can be used over and over. The panels are very low profile, and only span the nominal width of the KeyMod interface (approximately .6"). This enables them to be used all KeyMod surfaces. Shortening the panel is easy; I've scored them with an X-acto knife then bent them to break them. You can also use scissors or snips. You don't even have to cut between the plugs, you can cut right in the middle of them and they'll hold. Then, I just cleaned up the edge with sandpaper to round it off a bit. Since the panels are so narrow, they only cover the width of a single KeyMod interface; they don't wrap around a handguard. On the BCM KMR, with its octagonal cross-section, seven panels can be installed such that they create a rounded cross section. Some handguards, like the Fortis Switch rail above or the Noveske NSR below, only have three KeyMod interfaces, at 3 , 6 and 9 o'clock. Notes/Observations - These aren't really 'rail covers' or 'rail panels', since the KeyMod interface isn't a rail. They're just 'covers' or 'panels'; but everyone will still know what you're referring to by 'rail covers'. I really like them. They weigh next to nothing and are so low profile they add very little bulk to a handguard. However, thin as they are; they do provide good insulation as well as a ton of additional grip due to their aggressive texture. I shot with and without gloves, and the KeyMod panels offered enough insulation to negate the need for gloves even when going through a couple of mags quickly. Covering up the KeyMod holes will obviously affect air flow to some degree; but I doubt that it's going to make a difference, especially if the panels are strategically placed and the entire handguard isn't sealed up with panels. The BCM KeyMod panels look good, they're inexpensive, and work really well. One of the best KeyMod accessories ever!
|
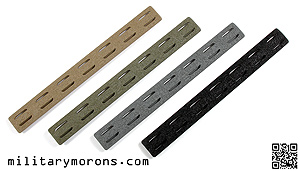
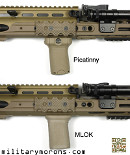
11/5/17 -Bravo Company USA has introduced M-LOK versions of their popular accessories. Pictured here are their Rail Panels, KAG and Vertical Grip. M-Lok is the direct-attach method free-licensed by Magpul Industries Corp, whereas KeyMod is the open-source creation of a partnership between Vltor and Noveske. Both allow direct attachment of accessories to handguards without the need for adding Picatinny rails; reducing weight and bulk. BCM has been a champion of the KeyMod system, which is not surprising as BCM's main designer is Eric Kincel; who started Vltor. By introducing M-Lok accessories, BCM has shown that they don't suffer from the 'Not invented here' syndrome, which benefits the customer who now has more options to choose from. Rail Covers - The BCM MCMR (M-Lok Compatible Modular Rail) Rail Panel Covers come in only one length, of 5.55", and can be trimmed if need be. They're made of high-strength polymer in the U.S.A. Some of the key features of the panel covers are:
The main difference between the M-Lok panels and the KeyMod panels are the molded 'plugs' with little tabs which snap into the M-Lok slots. The panels are installed by simply starting at either end of the panel, and pressing the plugs into the M-Lok slots sequentially. Once installed, they're solid and there's no way they're coming out unintentionally. To remove them, insert something thin/sharp (but non-marring) to grab and edge or corner, then pull them off. The panels are flexible (to a certain extent) and can be used over and over. The panels are very low profile, and only span .625". This enables them to be used all M-Lok surfaces. Shortening the panel is easy; I've scored them with an X-acto knife then bent them to break them. You can also use scissors or snips. You don't even have to cut between the plugs, you can cut right in the middle of them and they'll hold. Then, I just cleaned up the edge with sandpaper to round it off a bit. KAG - The KAG (Kinesthetic Angled Grip) is a small grip that functions more like a hand stop. It has an angled ramp which leads to a forward-raked grip that is only about an inch and a half tall. The KAG is made from molded polymer and is available in Picatinny, KeyMod and M-Lok versions. Some of the key features of the BCMGUNFIGHTER KAG are:
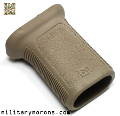
The M-Lok verison of the KAG shares the same features as its KeyMod version, except for the direct-attach M-Lok interface. Instead of a metal KeyMod anchor, it has two M-Lok T-nuts that engage the slots in the hand guard, plus a recoil lug. It utilizes two screws to snug the T-nuts to the rail, accessed through the bottom of the grip. To install the grip, the screws are loosened then pushed in with the included wrench so that the nuts protrude from the base. The T-nuts are inserted through the hnadguard slots, and the screws are then tightened. Vertical Grip-Mod 3 (M-Lok Compatible) - The BCMGUNFIGHTER Vertical Grip Mod 3 is a cost-effective, 'no frills' short vertical grip, coming in at half the price of the BCMGUNFIGHTER Vertical Grip SHORT reviewed previously. Some of the key features are:
The M-Lok verison of the Mod 3 shares the same features as its KeyMod version, except for the mounting interface. It has a two T-nuts that engage the slots in a M-Lok hand guard. It utilizes the two screw to snug the T-nuts to the rail, accessed through the bottom of the grip. To install the grip, the screws are loosened then pushed in with the included wrench so that the nuts protrude from the base. The nuts are inserted through the slots and the screws are then tightened. I've illustrated it below mounted to a KDG SCAR-16 handguard. It now sits flush to the bottom of the handguard whereas the Picatinny version of the Mod 3 only sat as low as the rail that it was attached to (which is why the SHORT grip worked better even though it was wider at the top). The M-Lok Mod 3 is now perfect.
|
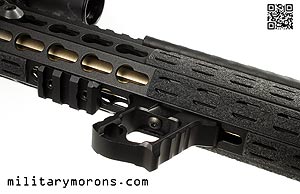
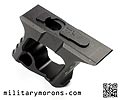
| 8/19/17 - The Halo Series HandStop from Tyrant Designs is a short angled aluminum hand stop that is compatible with both KeyMod and MLOK mounting systems. About Tyrant Designs - Tyrant Designs CNC is a Chicago-based company that branched out into firearms accessries after 30 years of machining experience in the defense, aerospace and medical industries. They currently specialize in CNC-machined grips for the AR-15 series of weapons. Description - The HandStop is a short version of Tyrant's Halo MiniVert Grip; and is a machined aluminum, skeletonized hand stop that is 1.5" long, 0.65" wide and weighs less than an ounce (0.9oz). The HandStop is angled back approximately 35° (my own guesstimate) and has horizontal knurls/grooves on the front and back surfaces for traction. There's a small bump on the front bottom corner to aid in keeping the hand in place. The transition to the handguard is tapered and comfortable. The top of the HandStop features a recoil lug that is compatible with both KeyMod and MLOK systems. Note that the while the HandStop is reversible on MLOK handguards, it only fits on KeyMod handguards one way. Edges are chamfered both outside and inside. The HandStop is available with KeyMod or MLOK hardware, or with both (shown here). There is a hole at the top of the HandStop through which a screw for the KeyMod nut or MLOK T-nut is secured. Tightening or loosening the hardware requires ball-end hex wrenches (included) inserted at an angle as there is no direct-access hole at the bottom. Note/observations - To be honest, the Tyrant Designs HandStop is a bit off the beaten path for me. I had checked out their site before, and while the products looked well-made, their aesthetic and function just didn't appeal to me personally. When it comes to components for my AR15s, I tend to avoid brightly anodized colours and skeletonized aluminum controls, and especially anything with more than one finger swell/groove. I'd rather have a hand-filling molded plastic grip as it's more comfortable to me. I've always associated bright anodized colours with competition shooting, which I haven't done in years, but do realize that they're much more popular now than a decade ago. Some companies (like Battle Arms Development) have been able to cater to a wide customer base by offering functional products in both 'subdued' and 'bling' finishes. Over the years, I've also moved away from full size vertical grips; preferring the shorter stubby ones. So when Tyrant came out with their Halo HandStop, it looked much more like something I'd use. I typically use a vertical grip with my support hand while shooting to add some rearward pressure without having to grip the handguard as tightly. If you're grabbing onto the end of a broom stick while someone's trying to pull it away from you, you have to grip it tightly to keep your hand from sliding off. With a vertical grip or handstop, it helps prevents your hand from sliding off, and the amount of strength needed to hold onto the broomstick is reduced. Another consideration (for me) is that I'm not shooting all the time I'm carrying a rifle at a range. A lot of the time is spent standing at the line waiting for my turn to come during individual drills. In such a case, a vertical grip puts the hand in a more neutral position than an angled one, when the muzzle is pointed down. That's where I've found a vertical grip with a forward angle actually works well for both shooting and carrying a rifle, which is why you see all my BCM vertical grips angled forward. My experience with angled grips goes back to the Magpul AFG, which didn't really catch on in popularity as much as vertical grips. The other is the BCMGUNFIGHTER KAG (Kinesthetic Angled Grip). The KAG has a reverse angle to keep the hand in place without slipping off, and is both comfortable and compact. So, I installed the Halo HandStop on my rifle, which I think could have been made easier by adding an access hole in the bottom so that a ball-driver tip hex wrench isn't needed. A hole wouldn't affect the function of the HandStop and also allow any hex key to be used (in case I lost the ball driver one). The skeletonized design of the Halo HandStop isn't as uncomfortable as I thought it would be, but isn't as comfortable as I'd like it to be. So, it falls in-between. This is due to the square profile of the HandStop, and the grooves. While the corners of the HandStop are beveled, they are still angular, and not as comfortable as a rounded profile would be. I think that handstops and vertical grips should be treated just like a pistol grip - they're always rounded for ergonomics and comfort. The horizontal grooves also detract from the comfort, unless I'm wearing gloves. Some might disagree with me, but I've always felt that traction grooves on vertical grips should be vertical, not horizontal. If you think about it, your hand seldom slips off the bottom of a vertical grip. It's always slipping around it. Vertical grooves give you more torsional control as well. When I brought this up to some plastic grip manufacturers, they told me that they agreed, but the main reason that they went with horizontal grooves was that it was harder to release items with vertical grooves from a mold, especially if there were grooves all the way around. When pulling back on the grip, I'd found myself wanting a larger protrusion at the bottom front corner of the HandStop to prevent my hand from slipping off; maybe one the same size as the protrusion on their Halo Series Foregrip. What I did like about the Halo HandStop was that the transition to the handguard was very low profile like the KAG, it's a good-looking handstop (to me), and overall quality was very good. Also, wearing gloves made it feel more comfortable, but I don't always wear gloves when shooting. If I were to suggest changes to the Halo HandStop, they would be:
Note that these suggestions are based purely on my own personal preferences and usage. It's entirely possible that the Halo Handstop may work perfectly for someone else. I was hoping that it felt as good as it looked, but it did fall short in that department for me. The beauty of CNC'd products is that it can be easier to make design changes than injection molded plastic products, when you've already sunk a lot of money into a mold. Tyrant Designs shows that they have the manufacturing know-how to produce a quality product and are open to input, so I've high hopes that their designs will evolve and improve over time.
|
ATTENTION! PLEASE DO NOT LINK DIRECTLY TO MY IMAGES
-
IT RESULTS IN MY BANDWIDTH ALLOCATIONS BEING EXCEEDED,
AND MY PAGES GO DOWN. THANKS!
/ . PLEASE
OBSERVE AND RESPECT OUR COPYRIGHT! . /
©opyright by MilitaryMorons.com. All Rights Reserved. Reproduction, Duplication,
Distribution Strictly Prohibited.
Unless mentioned otherwise, content and images are the
property of militarymorons.com and are not in the public domain.
They are not to be used without
permission. Please Contact
me for permission to use any images or content herein.


